Wow! It's been a loooong time! I might forget how to do this! jk:)
So I was saying the other day that Yorkton, Sk should get a craft/scrapbook store. And a GF of mine asked me if I've been to the one by her house, some how, I missed this store. Well let me tell you!!! Wahoo! Scrappers Studio located here in Yorkton (by appointment only) or Online http://www.scrappersstudio.ca/ is AMAZING!!! Thank you Peggy for running your fabulous business!
Here is what I found:
Now, my steal~of~a~deal~ was a...CROP A DILE/BIG BITE!!! I am so excited to have Finally made this purchase! I have been looking for 2 months for one...(cost of shipping from different websites is what stopped me!) At Scrappers Studio it was $52 and I got it for 30% off!!! Yeah!
I also got 13 pieces of cardstock, Journaling stickers, ribbon tape(hehe excited to try it out!) vellum quotes, eyelets, stickers, ribbon, etc! If you can't tell I am pretty excited about this purchase!
Cannot wait to start trying everything out!
~Happy Crafting!~
Thursday, July 28, 2011
Tuesday, May 24, 2011
My Cloth Creations
Here is another little project that I am Loving! Using any kind of cloth, fabric, or whatever you have kickin' around you can make these awesome little flowers for your hair, hats, purses, shirts, etc!
They are so fun and easy to make!
Take a piece of felt or cardstock (or pretty much anything that has stability to it) Using Aleene's Fast Grab Tacky Glue, adhere one end to the middle of a circle cut out, keep going around and around, folding, twisting, scrunching the fabric as you go. (The each one will be unique because of the way you handle the fabric, go with what feels right to you)
When you get to the end of either the fabric or the cardstock, tuck fabric under the cardstock and glue to secure. When thoroughly dry, trim cardstock so you can't see it through the fabric.
And there you have it! When you are done, if you didnt start with felt as a bottom, you can add this now and secure a hair clip or a pin to the back! Voila!
~Happy Crafting!~
Burlap Storage Bins
WOW! I have been away from the blog world for awhile! I've been wanting to jump back into this for sometime now, but I have been so busy this month with kid's activities, bridal showers, baby showers! This coming up weekend is my 5 year olds FIRST ballet recital! As well as my 8 year old is cutting all her hair off for the Brayden Ottenbreit Close Cuts For Cancer! Way to go baby cakes!
Run, run, run!
Anywho...I haven't done a whole lot of crafting in this time, but I have made a couple things...here is what I've been working on.
1. Once spray paint is dry, spray the Elmer's Adhesive on one (1) side at a time, pressing the burlap as you go.
2. Don't worry about the edge/corner right now, you can make it pretty in the end; or for this project I just left it because it will be hidden at the back.
3. When all four (4) sides are dry, check to make sure that none of the fabric lifted. If this happens, I just add some of the Fast Grab Tacky Glue to that area.
4. Using the Tacky Glue, adhere the ribbon to all four (4) sides. (I put mine at the top for this project)
5. Feel free to spice it up by using different material, adding embellishments, flowers, etc! I currently have 2 made. One is on my shelf above my cabinets holding odds N ends. The other I am using as a storage bin for all my lunch supplies for my kiddies!
Hope you like it!
~Happy Crafting~
Run, run, run!
Anywho...I haven't done a whole lot of crafting in this time, but I have made a couple things...here is what I've been working on.
 |
| One empty box (I like the wipes boxes or the small huggies diaper boxes) |
 |
| Enough Burlap (or canvas to cover all sides) |
 |
| Spray Adhesive, Aleene's Fast Grab Tacky Glue (or hot glue), scissors, ribbon |
 |
| Before starting, spray with Krylon spray paint (I used Grey - Indoor/Outdoor) Let dry |
1. Once spray paint is dry, spray the Elmer's Adhesive on one (1) side at a time, pressing the burlap as you go.
2. Don't worry about the edge/corner right now, you can make it pretty in the end; or for this project I just left it because it will be hidden at the back.
3. When all four (4) sides are dry, check to make sure that none of the fabric lifted. If this happens, I just add some of the Fast Grab Tacky Glue to that area.
4. Using the Tacky Glue, adhere the ribbon to all four (4) sides. (I put mine at the top for this project)
5. Feel free to spice it up by using different material, adding embellishments, flowers, etc! I currently have 2 made. One is on my shelf above my cabinets holding odds N ends. The other I am using as a storage bin for all my lunch supplies for my kiddies!
Hope you like it!
~Happy Crafting~
Thursday, April 14, 2011
Easter Baking Part II
Hello once more for today! :) Here is the second half of my baking fun for today!
 |
| One pretty bunny... |
 |
| Two pretty bunnies... |
Great Mother's Day Project
I just saw this neat project on Tip Junkie's FB page. I thought I would feature this great Mother's Day Idea from design.wash.rinse.repeat.
I just love how these turned out! Don't forget to check out the website! http://go.tipjunkie.com/md/252/celesterockwood-jones.typepad.com/designwashrinserepeat/2009/02/freebie-fortune.html
~happy crafting!~
Easter Baking!
Happy Spring Afternoon Everyone!
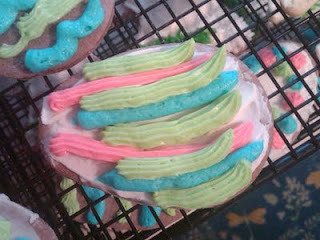
My friend Jennifer told me about stain glass window cookies. Regular sugar cookies with the centres cut out (before baking) and filled with crushed lifesavers...what a cool idea!
My son, Adam "helping" momma bake!
This is a before picture! I used tinfoil to help the melting process of the candy! (and helps for clean up on cookie sheets)
*If anyone has any tips or tricks on how to crush candy without making a mess, it would be much appreciated! *
I put a full pack of lifesavers in a Ziploc bag, and used my wooden rolling pin to beat the daylight out of the candy:) It worked out ok, but I need to crush them finer next time!
Finished product! Yumm!
Stain Glass Window Cookies
1 Cup Shortening
2 Cups Sugar
2 Eggs
1 Cup Sour Cream
2 tsp. Vanilla
1 tsp. Salt (I have cut out salt of baking and it seems to work just fine)
1 tsp. Baking Soda
2 tsp. Baking Powder
5 Cups Flour (more for rolling)
1 Cup crushed candy (lifesavers work best)
Cream together shortening, sugar, and eggs. Add remaining ingredients and mix well to form a soft dought. Roll out dough and cut into any sized circle, and a mini circle cut out of middle. Place on cookie sheet with tinfoil. Put some crushed candy in centre just enough to reach edge of mini circle. Put in oven for 8-12 minutes @ 350 degrees.
Enjoy!
Monday, April 11, 2011
a couple L.O.L moments
I saw this posted on T-RAY's blog, and thought it was hilarious! Enjoy!
Dear Noah,
We could have sworn you said the ark wasn't leaving till 5.
Sincerely,
Unicorns
Dear Icebergs,
Sorry to hear about the global warming. Karma's a b****.
Sincerely,
The Titanic
Dear America,
You produced Miley Cyrus. Bieber is your punishment.
Sincerely,
Canada
Dear Yahoo,
I've never heard anyone say, "I don't know, let's Yahoo! it..." just
saying...
Sincerely,
Google
Dear 2010,
So I hear the best rapper is white and the president is black? WTF
happened?!
Sincerely,
1985
Dear Windshield Wipers,
Can't touch this.
Sincerely,
That Little Triangle
Dear Rose,
There was definitely room on that Door for the both of us.
Sincerely,
Jack
PS, you let go
Dear Saturn,
I liked it, so I put a ring on it.
Sincerely,
God
Dear Fox News,
So far, no news about foxes.
Sincerely,
Unimpressed
Dear jf;ldsfa/kvsmmklnn,
Please lknvfdmv.xvn.
Sincerely, Stevie Wonder
Dear Nickleback,
That's enough.
Sincerely, The World
Dear Skin-Colored Band Aids,
Please make one for every skin color.
Sincerely, Black people
Dear Osama Bin Laden,
Marco....
Sincerely, United States
Dear World of Warcraft,
Thank you for ensuring my son's virginity.
Sincerely, Parents Everywhere
Dear Anne Frank,
Two can play this game....
Sincerely, Waldo
Dear Batman,
What was your power again?
Sincerely, Superman
Dear Customers,
Yes, we ARE making fun of you in Vietnamese.
Sincerely, Nail Salon Ladies
Dear Global Warming,
You're the best imaginary friend ever!
Sincerely, Al Gore
Dear Ugly People,
You're welcome.
Sincerely, Alcohol
Dear Mr. Gump
WTF are you talking about? There's a little diagram on the lid that tells
you EXACTLY what you're gonna get....
Sincerely, Jenny
Dear Katy Perry,
I liked the kiss too.
Sincerely, Justin Beiber
Dear Martin Luther King Jr.
I have a dream within a dream within a dream within another dream.... What
now?
Sincerely,
Leonardo Di Caprio
Dear World,
Please stop freaking out about 2012. Our calendars ends there because some
Spanish d-bags invaded our country and we got a little busy ok?
Sincerely,
The Mayans
Dear Snooki,
GET BACK TO WORK!
Sincerely,
Willy Wonka
Dear White People,
Don't you just hate immigrants?
Sincerely,
Native Americans
Dear iPhone,
Please stop spellchecking all of my rude words into nice words. You piece of
shut.
Sincerely,
Every iPhone User
Dear Giant Spider on the Wall,
Please die. Please die. Please die. Please die. CRAP! Where did you go?
Sincerely,
Terrified
Dear Dr. Phil,
Look man, there's only room for one fake doctor in this world and I was here
first.
Sincerely,
Dr. Pepper
Awesome Blog!

Just stopped in at Hi Sugarplum! and they have a FABULOUS giveaway over there! Head on over and check it out! It ends on April 14th! Winner announced on the 15th:)

Mini Shoebox Tea/Coffee Bin
Here is a mini project that I did this afternoon while hanging around the house:)
I was clearing out my snack/coffee tea cupboard and needed a bit more storage:) So I just took a shoe box and used Glue Dots and funky paper to cover it!
Simplest project around;)
~Happy Crafting~
I was clearing out my snack/coffee tea cupboard and needed a bit more storage:) So I just took a shoe box and used Glue Dots and funky paper to cover it!
Simplest project around;)
~Happy Crafting~
Sunday, April 10, 2011
Keep Holding On - Virtual Choir
Not a craft, but this is a creation:)
In January of this year, we lost a wonderful woman, who impacted MANY people's lives...
This is a virtual choir that her daughter put together, in honor of her:)
Miss you Jan:)
Thursday, April 7, 2011
Mini File Folder Album
I started out with a full sized manilla envelope, but cut it in half to do a project for a friend of mine.
Here is what it looked like when I started:
This one was used for another project:

And that is the finished product! Great for storing coupons, receipts, bills, movie tickets, etc!
~Kim's Koupons~
Made this one for my friend in Russell, Manitoba.
~Happy Crafting!~
Here is what it looked like when I started:
This one was used for another project:
 |
| No where near being finished;) |
Back to the mini one...I cut folder in half and just started putting it all together!
Front Cover
Inside
Back

And that is the finished product! Great for storing coupons, receipts, bills, movie tickets, etc!
~Kim's Koupons~
Made this one for my friend in Russell, Manitoba.
~Happy Crafting!~
More Redberry Photos!
Day 1: Our Luggage that we started out with.
12:30 P.M. Locked ourselves outta the cabin! Gals we should of got the picture of me with my feet hanging out the window, after prying window open!
Sav sleeping in one of the 11 bunk beds in our cabin...
Not a great picture but...I was there!
This is a "scrapbooking" chair! On the packing list for next time is one of these chairs. It is made with bungee cords:) However, Canadian Tire says there is 8 in stock, but cannot find one for me...the search continues!
Day 3: This is our loot for the ride home!
Again I say, we had a blast! Can't wait to do it all again in the fall!
Wednesday, April 6, 2011
This & That
Raina's pages...
"Some" of my purchases! Need to bring more cash next time:)
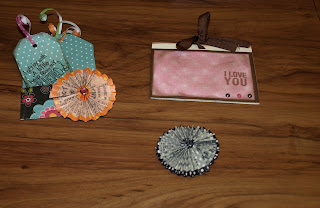
A couple of the make and takes. Left: Country Moose
Right: Close to My Heart
Bottom: My own take on part of the Country Moose one (I am addicted to polka dots now:)
Cadee's page...
AND a close up of the Country Moose "flower"! Any suggestions on where to find Polka Dot supplies? ;)
Thought I would post a few of the mini projects I got done last weekend...more pics to follow soon! Enjoy!
Subscribe to:
Comments (Atom)


